Posts

Showing posts from September, 2020

Jar of flowers- create your own background

Image
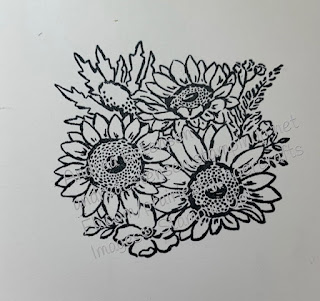
Hello! Thanks for visiting! I can't believe it's nearly the end of September... this is the last installment of this bundle feature. I've loved creating with this set- it's so diverse, and can be used for so many occasions. I'll be continuing with one final project tomorrow over on my YouTube channel , where I'll be showing how to use the jar domes.  Let's get started with today's project! Gather your supplies! For this, I used the Jar of Flowers and So Inviting stamp sets, Memento ink pad, stamp block, ribbon, Stampin' Seal, cardstock in Whisper White (4 1/4 x 5 1/2 piece and 3 x 4 1/2 piece and Basic Black (3 1/4 x 4 1/2 piece). Pick your stamp from the set, and ink it up. Start stamping your way around the cardstock. You don't need to be too fussy about the centre of your card, as it will be covered with the Basic Black cardstock. Make sure to lay a scrap of paper on your work surface to protect it. Adhere the black cardstock on the area you j
Bundle feature- Jar of Flowers scarecrow

Image
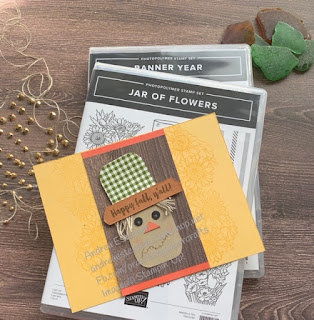
  So- a little out of the box project for today. I've been seeing Mason jars online, painted to look like scarecrows, and I think they are pretty darned cute! So, today's card draws from that inspirations.  The weather has been decidedly fall-like here the past couple of weeks, and it has clearly put me in the mood for all things autumn. The pressure cooker is out, and cooler weather meals are being made, sweaters are out of hibernation, and produce is coming in from the garden. Well, with a couple of frosts under out belts already, most of the garden goodies are already in.  I'd say Mr. Scarecrow looks a little frazzled that summer has come to an end! For this project, you will need: Jar punch, So Saffron cardstock, Crumb Cake card stock, a small piece of Pumpkin Pie cardstock, Cinnamon Cider cardstock, glue dots, Stampin' Seal, Soft Suede Stampin' Write marker, linen thread, Heartwarming Hugs patterned paper, In Good Taste patterned paper, a hole punch and Whisper

Join the fun

VIP and Rewards

Image
Thank you for choosing me as your Stampin' Up! demonstrator.  My customers mean the world to me!  Starting in October 2020, as soon as you place an order of $50 or more, before shipping and tax, and use the monthly host code, you become a VIP! Once you're a VIP, you'll get: - access to an exclusive Facebook group where you'll get exclusive posts and ideas, first notification of any sales, promotions, events, and classes (min 24 hours, unless it's a flash sale announced by Stampin' Up!). You'll remain a VIP from the first $50 order, and continue to be a VIP for six months.  - a copy of all catalogues that are released while you are a VIP - A free thank-you gift from me each month you place an order of $50 or more (before shipping and tax) - Automatic enrollment in my thank-you program to earn free product - A card from me that you can send to someone special - Free shipping on one order in your birthday month- just let me know when that is! New to stamping or

About me

  I am one of those rare people who love what they do, and get to share what they love. I love creating with ink and paper! I’ve been paper crafting for about 15 years, and have owned my Stampin’ Up! business, Prairie Sky Paper Crafts, for four years. I am based in Woodlands, Mb, but I have clients from coast to coast.  Creativity has always had an important place in my life. No matter what the creative outlet is, I feel it helps balance your life, destress, and take some much-needed time for yourself.  My style tends to be relaxed, clean and fun. My motto is there's no wrong in art, and I encourage self-expression. It's your project, and you need to love it.   Why do I love being a Stampin' Up! demonstrator? There's so many reasons.  Partially for the VIP access of being among the first to see new catalogues and order new products, and the minimum discount of 20% on all purchase, and minimum 20% income from all sales.  But, more importantly, it's about connectin

Online classes

Image
 Be sure to check back often for my offering of online classes. You can also check out my Stampin' Up! page for more information. Upcoming classes are listed in chronological order. Handmade Holidays: Wonder of the Season Class Date: October 29, 2020 Register by: October 16, 2020       Christmas Countdown calendar Class Date: November 20, 2020 Register by: no set date, but kit purchase is required.    

Bundle focus- Jar of Flowers- Masking

Image
Welcome back! I am having so much fun creating with this stamp set. I have had it out on my desk for most of the week. Kids are back in school, which means I have a bit more time to play. For this week's feature, I decided to touch on masking. It's a fairly simple technique that lets you layer stamps, but it looks as though it's one solid image. Materials needed are listed at the bottom of this post. Take the floral image you want from the Jar of Flowers stamp set, ink it up in Momento Tuxedo Black, and place it on your Whisper White card stock strip, closer to the top. I placed mine about three inches from the bottom and one inch from the side. You can place the uninked jar stamp on your paper first to check alignment. Stamp a second impression of the floral stamp on a sticky note, and cut out around the bottom to create a mask. Place the mask over the top of your previously stamped image. This will be where the jar stamp hits when you ink it and stamp it. Once you have st

Friday feature- Triple Stamp Technique

Image
Hello again! Every Friday, I upload a video to my YouTube channel, and this week, I focused on the Triple Stamp Technique. I love this technique- it looks hard, but is really quite simple, and the effect is stunning. For this card, you will need: Cajun Craze ink Cajun Craze cardstock Daffodil Delight ink Old Olive ink Pumpkin Pie ink Whisper White cardstock Wonderful Gems Adhesive You'll need to cut your cardstock to the following dimensions:  Cajun Craze: 4 1/4 x 5 1/2 inches 3 x 4.25 inches 1 3/4 x 3 inches Whisper White: 4 x 5 1/4 inches 2 3/4 x 4 inches 1 1/2 x 2 3/4 inches Take the Whisper White pieces, and adhere them together with a tiny bit of adhesive- this is to keep them from slipping while you stamp, you'll be taking them apart later. Ink up your stamps, and stamp your cardstock. Once you're done, take them apart carefully, and adhere the layer pieces with the solid cardstock, as shown in the top photo. Check out the video for full instructions . Don't forg

Bundle focus- Jar of Flowers

Image
  Thanks for dropping by! I'm starting a new feature where every Thursday, I'll highlight a project made with one of Stampin' Up!'s bundles. This month, I'm be working with the Jar of Flowers bundle.  Milk glass is one of my favourite collectables- I have several pieces that have come from f amily members or garage sales. I'm not sure what it is about it that I am drawn to, but it always makes me feel happy to see it- in fact, I have some pieces on my desk that hold pens and other supplies. I decided that the jar punch would be perfect to recreate the look of milk glass. Let's get started! You'll need: Vellum sheets Jar punch Merry Merlot card stock (cut to 2 1/4 x 5) Misty Moonlight cardstock (cut to 4 1/4 x 5 1/2) In Good Taste patterned paper (4 x 5 1/4) Adhesive sheets Plush Poinsettia specialty paper Stampin' Seal First, I punched two jars from vellum paper, and one from Plush Poinsettia specialty paper. Plush Poinsettia was run through the embo