Posts

Showing posts from July, 2021

One sheet wonder

Image
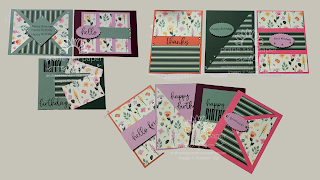
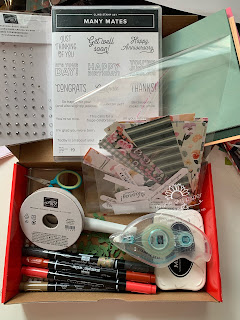
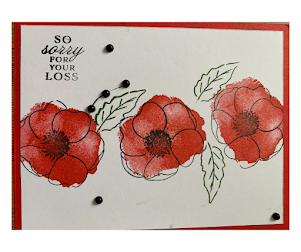
One sheet wonder cards are so much fun to make. This template will create 10 cards. I have added coordinating cardstock, as well as some Basic Rhinestones to add some shine. The Double Oval Punch was also used for some of the cards. All the sentiments were stamped in Memento Black ink.  You can download the cutting template here . The layout is here . In my video, I referenced the cost of making your own cards. Check out the video on YouTube . Breaking it down: 2021-2023 In Colour cardstock- $12.25 (20 sheets, 8 1/2 x 11") Basic White cardstock-  $13.25 (40 sheets, 8 1/2 x 11") Designer Series Paper $15.75 (12 sheets, 12 x 12") Clear envelopes $8.25 (50) Basic White envelopes $10.25 (40) You can get 80 cards from a pack of Basic White cardstock, which could create several cards. If you paired the carstock with a stamp set that has sentiments for many occasions, like Peaceful Moments ($29), you can quickly and easily make cards for any occasion. The cost for 80 cards, inc

Designer Series Paper 12 x 12 gift holder

Image
 Quick and easy project for you today- no cutting, no stamping, and you'll end up with a nice, large gift bag. Check out the video here. It'll take you about 10 minutes, and you'll be out the door with a unique bag in hand.  Supplies needed:  12 x 12 sheet of Designer Series Paper (Pansy Petals and In The Wild were used for the examples.) Ribbon Scissors Adhesive (I used Stampin' Seal) Hole punch Take your piece of 12 x 12 paper, and score horizontally at 2 inches on the top and bottom. Score vertically from the edge of the paper to the 2" score line at 3 3/4", 7 1/2", and 11 1/4".  Pinch the score lines so they are visible, and then run tape or glue from the top to bottom of the paper on the 3/4 inch tab. Line up the left side of the paper to the score line, and press to create a tube (ensure the tab is on the inside of the tube. Pinch the tabs together, and then punch one hole roughly in the centre of each- there will be three holes on each end. Th

Crafting on the go

Image
Every year before we moved back to Manitoba, we'd load the kids, the pets, and whatever we'd need for several weeks away from home and drive half-way across the country for our summer visit. When we were home for the summer, I would also run a card class, so that meant bringing everything I would need for that. Usually, it involved a tote full of crafting goodies. I got REALLY good at packing, and using up every inch of space. If you're going on a road trip, want something to keep you busy while you wait for an appointment, or just need something for a rainy (or too hot) day, a grab and go kit is the way to go!  Check out the video to see everything that went into my kit.  Now, the absolute easiest way to accomplish this is with one of the Kit Collection kits- it includes everything you need, and the only extras you might want to tuck into the box is a stamp block, and pair of snips. Paper Pumpkin is also a great on-the-go kit, and with the first kit you get, you'll

#simplestamping Poppy Parade

Image
I've been in a bit of a red and white mood this week... today, I decided I needed to play with Poppy Parade, and the Painted Poppies stamp set.  The two cards were both done with Poppy Parade and Memento Black ink, and Black Matte Dots. Check out the video here to see how I did it! Shopping list: Poppy Parade cardstock Basic White cardstock Poppy Parade ink Memento Black ink Black Matte Dots Stampin' Seal Painted Poppies stamp set Prized Peony stamp set (sentiment) Forever Fern stamp set (sentiment)