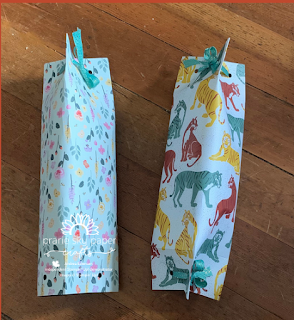
Designer Series Paper 12 x 12 gift holder
It'll take you about 10 minutes, and you'll be out the door with a unique bag in hand.
Supplies needed:
12 x 12 sheet of Designer Series Paper (Pansy Petals and In The Wild were used for the examples.)
Scissors
Adhesive (I used Stampin' Seal)
Hole punch
Take your piece of 12 x 12 paper, and score horizontally at 2 inches on the top and bottom.
Score vertically from the edge of the paper to the 2" score line at 3 3/4", 7 1/2", and 11 1/4".
Pinch the score lines so they are visible, and then run tape or glue from the top to bottom of the paper on the 3/4 inch tab. Line up the left side of the paper to the score line, and press to create a tube (ensure the tab is on the inside of the tube.
Pinch the tabs together, and then punch one hole roughly in the centre of each- there will be three holes on each end.
Thread the ribbon through the holes, and tie as desired.
Don't forget, select packs of Designer Series Paper are 15% in my Stampin' Up! store until August 2, 2021. Grab yours before it's too late!


Comments
Post a Comment