Posts

Something old, something new...

Image
 We're in the throes of the countdown to the end of the school year. Hubby teaches at a college, and will be done in just a couple more weeks. The kids and I, well, we have about 21 school days left (but who is counting? ;) ) Since my kids have started school, I prefer to give their teachers something consumable for the year-end gift. Usually, my husband makes hand-turned pens, and I like to add a little something for them as well. This week, I've been playing with the new Bird Ballad paper and Free as a Bird stamp sets, but I decided to add a favourite (but for some reason seldom use) set- Colourful Seasons. The sentiments for all of these cards come from that set. There are so many, and are so divers, they really would fit any occasion. With just a few pieces of paper, black in, and some cardstock, I was able to whip off a set of cards in just over an hour. This project would be perfect for the beginning stamper, too So far, I am loving the designer paper in the up...

Going, going.... Birthday Wishes for You

Image
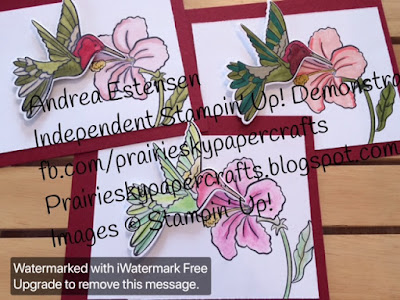
  The new Stampin' Up catalogue will be revealed next month, and products will be available as of June 4. For the remainder of this month, I am going to bid a fond farewell to some of my beloved stamps that will not be carrying over. It's my mission to give each one a little love, a little ink, and some time in the spotlight, and, hopefully give you, my readers, some ideas and inspiration for what you can do with the set, too. We're starting with Birthday Wishes for You. I love the simplicity of this set- it's stunning on its own, as a one layer card, or it can be dressed up in so many ways.  I decided to showcase it three ways, for the beginner stamper, the casual stamper, and the avid stamper.   Beginner stamper: This card is ideal for the beginner. All that is required is some Whisper White cardstock,  Memento Tuxedo Black ink, the stamp set and coloured pencils. The sentiment was stamped on the cardstock, and coloured with a Bermuda Bay watercolo...

Which ink for which colouring medium?

Image
Top left was coloured with Stampin' Blends. Top right was coloured with Stamp n' Write markers. Bottom was coloured with watercolour pencils and a blender pen.  I love colouring. Adding dimension and my own touch to the cards I make is relaxing, and I can customize it however I want. Stampin' Up! has a few different colouring mediums, but they all require a little bit of knowledge before you get started.  One of the first questions I usually get asked is how do I know what ink to use? Watercolour, colouring pencils and Blends (alcohol markers) are unique, and require their own starting points.  Here's a breakdown of the different inks. Classic Stampin' ink : can be used for general stamping (stamping directly onto paper). This ink is waterbased. It cannot be used for any colouring medium involving water or blender pens. However, you can pick up the ink with an aquapainter or blender pen and apply colour to your image.  Craft Stampin' ink : can be us...

What's in a name?

Image
Once upon a time, this blog was called papersparkle. At the time, I was a papercrafter- not yet a Stampin' Up demonstrator. When I joined Stampin' Up!, I left the blog name, and created a Facebook page called Stampin' with Andrea. It was suggested I get my page up and running as soon as possible, and at the time, that's what seemed like the most logical choice. Last year, I started to think more about the direction I wanted to take my business, and how I wanted to change it to better reflect what I am about, and what is important to me.  I'm a prairie girl- born and raised in Manitoba. I have lived on the prairies most of my life- I went to college in Brandon, MB and moved around to several small towns and cities in Manitoba and Saskatchewan until I met my husband in 2002. He was in the military, and we moved to Trenton, Ontario and Halifax, NS, and then back to Winnipeg. When he retired, we decided we wanted to move back to the East Coast. While I do love it ...

Sometimes, you just have to laugh

Image
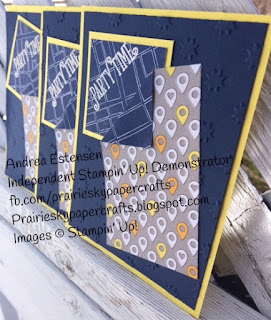
I am so happy to see the end of these party invitations!  My son's birthday is coming up. He originally wanted me to do a pizza theme card, but that just wasn't happening for me, so I decided to do sleeping bags for his sleepover party. Couldn't be easier, right? That's what I thought too.  It was a recipe for disaster from start to end, but they are done, and he's happy(ish) with them, which is all that matters.  I was laughing to myself while I was creating them- I was making every mistake in the book. Just goes to prove, it doesn't matter if you've been papercrafting for a while, or are just starting out, mistakes can happen. I cut the paper the wrong direction the first time. When I got everything sorted out, I taped the  designer paper (Best Route) onto the Pineapple Punch cardstock then stamped the sentiment (from Happy Birthday Gorgeous), and decided I wanted to emboss it, using silver embossing powder. I put the sleeping bag and pillows onto the...

Happy spring!

Image
I knew it had been a while since I updated my blog, but logging in, I was surprised to see how long. Spring is here, things are starting to grow, and a new season has begun. Fall has always been my favourite season, but spring is a close second. Buds appearing on trees, grass and flowers sprouting, and things starting to buzz.  April is a busy month for us. Both kids have birthdays this month, I've got a fundraiser for 10,000 Carrots Bunny Rescue on April 14 (if you'd like more information, check out my Facebook page ).   Back to this card. I am so in love with how it turned out. I love having a creative business, and feeding off the creativity of others. I saw a similar technique from a Stampin' Up! demonstrator in the UK, and was intrigued by what he had created. For his card, he used reinkers, and clear embossing powder to get an oxidized metal look. I tried so many variations of colour and layering and couldn't get the look he achieved, so I looked around my...

Time flies when you're having fun!

Image
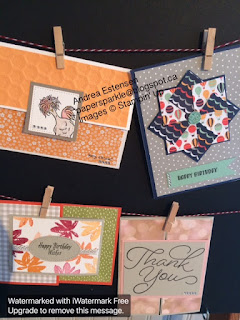
I can't believe it's the middle of March already. Where has the time gone? There's just about two weeks left in Saleabration. I've been creating using some of the free items I've received from the Saleabration flyer, and it's so nice to just sit back and play. My kids have been on March Break this week, and we've been doing some fun activities, as well as spending a bit of time in my creative space working away on different projects. Mine have involved paper, punches and ink... theirs have been cobbled together with tons of washi tape, glue and bling. Whatever keeps them happy! I'll be working on birthday party invitations and some Easter fun in the next couple of weeks. My kids' birthdays are a week apart, and fall just after Easter this year- busy times ahead! Here's a look at some of the cards I've created with Saleabration goodies (clockwise from top left): - Hey Chick stamp set - Designer Tee stamp set and Carried Away designer ...