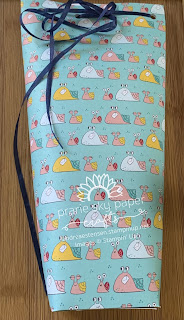
Quick gift bag and card
For this project, you'll need:
a 12 x 12" sheet of patterned paper
Ribbon
Adhesive
Stamp set
Ink pad
Stamp block
Hole Punch
Paper trimmer
3 x 6" piece of cardstock
3 x 3" envelope
Check out the video project here.
 First, you need to score and cut your paper.
Score
the bottom edge horizontally at 2 1/2 inches, then, vertically, score
to the horizontal line at 2 1/2, 5, and 7 1/2 inches. At the 10 inch
mark, score the full length, and then trim at 10 1/2 inches. With scissors, cut the partial score lines, and reserve the 1 1/2 inch strip you cut off for the card. You can cut off the little rectangle where the tab becomes the seal of the box.
Once
you have cut the bottom score lines, place adhesive in two or three
rows on each panel, ensuring you do not place adhesive on the inside
panel. Also place a strip of adhesive along the tab. (tip: I usually leave the outside panel free of adhesive and use
it as the inside.) Run a strip of adhesive along the long edge.Starting with the outside bottom pieces, form the bottom of your box, and then line up the long tab with the outside edge, and press firmly to create the tube.
Take your hole punch, and punch a few holes across the top for the ribbon, and thread as desired.
 For the card and envelope, cut three 3 inch strips from the piece you had leftover from making the bag.
Score
your 3 x 6 inch piece of cardstock at the 3 inch mark, and fold in
half. Adhere two strips to the front of the card, and stamp and decorate
as desired. Place the last 3 inch strip onto the envelope front to
decorate it.
Thanks for reading! don't forget to pop over to my Facebook page to say hi!


Comments
Post a Comment