Posts

Showing posts from June, 2021

Peony two ways

Image
I issued a colour question on my Facebook page the other day, and it was even, so I decided to do something with both colours! Check out the Facebook Live video here . The first card was done using the Prized Peony Stamp set. The image was stamped in Versamark on Cherry Cobbler, and embossed with clear embossing powder. The corners were rounded with the Detailed Trio Punch, and adhered onto a 4 1/4 x 5 1/2" piece of Very Vanilla cardstock. The sentiment was stamped in Memento Black.  The second card was stamped using Smoky Slate, on a piece of 4 x 5 1/4" Very Vanilla cardstock and then heat embossed with clear embossing powder. It was coloured using Calypso Coral and Old Olive watercolour pencils, and blended with the blender pen. The Detailed Trio punch was used for the corners, and the sentiment was stamped with Smoky Slate. It was layered onto a 4 1/4 x 5 1/2 piece of Calypso Coral cardstock.  Thanks for reading! Happy crafting!
Sweet and simple summer cards

Image
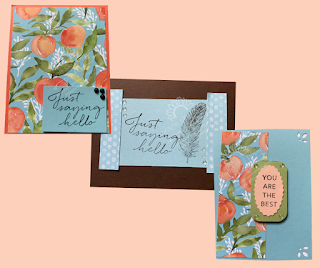
Today, I decided to use the You're a Peach designer series paper to create these sweet cards, which can be given in a set as a year-end thank you gift to teachers, or school staff. Check out the video here! Most of the colours in the Subtles colour family coordinate with this set. For my samples, I used Calypso Coral, Balmy Blue, Pear Pizzazz, Petal Pink, and Early Espresso. The stamp set used was Tasteful Touches , stamped in Memento Black . I cut the paper pack into 6 x 6" squares, and chose one of the pieces for the three cards. When you're cutting the paper, you'll need to decide if you are going to create vertical or horizontal cards, based on the pattern. The decision isn't as crucial if the paper has a non-directional pattern.  The largest piece was adhered onto a 4 1/4 x 5 1/2 piece of Calypso Coral cardstock, and a 2 1/2 x 1 3/4 piece of Balmy Blue was used for the sentiment. Matte black dots were used to ground it. The centre card was created by st...

Quick gift bag and card

Image
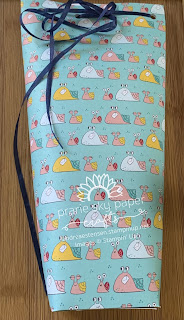
End of the school year will soon be upon us... here's a super quick idea for a square bottom tube bag, and a card.  For this project, you'll need:  a 12 x 12" sheet of patterned paper Ribbon Adhesive Stamp set Ink pad Stamp block Hole Punch Paper trimmer 3 x 6" piece of cardstock 3 x 3" envelope Check out the video project here . First, you need to score and cut your paper. Score the bottom edge horizontally at 2 1/2 inches, then, vertically, score to the horizontal line at 2 1/2, 5, and 7 1/2 inches. At the 10 inch mark, score the full length, and then trim at 10 1/2 inches. With scissors, cut the partial score lines, and reserve the 1 1/2 inch strip you cut off for the card. You can cut off the little rectangle where the tab becomes the seal of the box. Once you have cut the bottom score lines, place adhesive in two or three rows on each panel, ensuring you do not place adhesive on the inside panel. Also place a strip of adhesive along the tab. (tip: I us...

Let's get a little messy!

Image
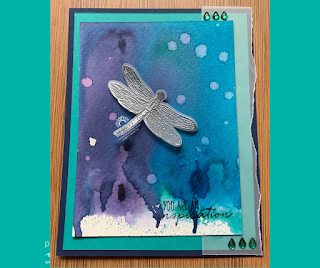
Remember when you were a kid, and you'd get good and mucky when creating? That's how I have been feeling the past few weeks when I have been creating in the craft room. Soft pastels, ink, and now this- a fun watercolour background technique using reinkers.  It looks like a hot mess when you're doing it, and it's a bit of a surprise as you wait for the paper to dry, made faster with the heat tool, but still... it's a different look every time.  Check out the YouTube video here . To create this background, I used Night of Navy, Bermuda Bay, and Pacific Point reinkers. Apply the ink to a sheet of acetate, spray the sheet with water, and spray the Fluid 100 watercolour paper as well, and apply it to the acetate wet side down. Dry with a heat tool, or let air dry, and then add a few drops of water by dipping your fingers into water and sprinkling it onto the card.  The dragonfly was done using Pacific Point ink on vellum, and then heat embossing with silver emb...

One Sheet Wonder- Ice Cream

Image
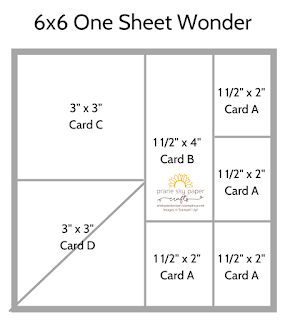
Hands up if you love one sheet wonders (OSW)... I absolutely love them. With one cutting template, you can create multiple cards with the same paper, but totally different looks.  In my monthly product share, I include a 6x6 one sheet wonder template, and I have offered them to my newsletter subscribers ( if you'd like to subscribe, click here ). In today's Facebook Live over on my page, I created a 6x6 OSW, and made four cards out of one 6x6. Cutting one 12x12 would make 16 cards- pretty good bang for your buck, I'd say!  For this template, you're going to cut one strip at 1 1/2", and then cut that strip to 2" lengths.The second strip is going to be cut at 1 1/2" and one cut made at the 4 inch mark. The remaining 3" piece will be cut at the 3" mark, and one of the squares will be cut at the diagonal.  For this set of cards, I chose to use the Ice Cream Corner designer series paper from Stampin' Up. It'll be retiring at the end of June,...